Motion tracking turret
Camera to contour to stepper angle to trigger
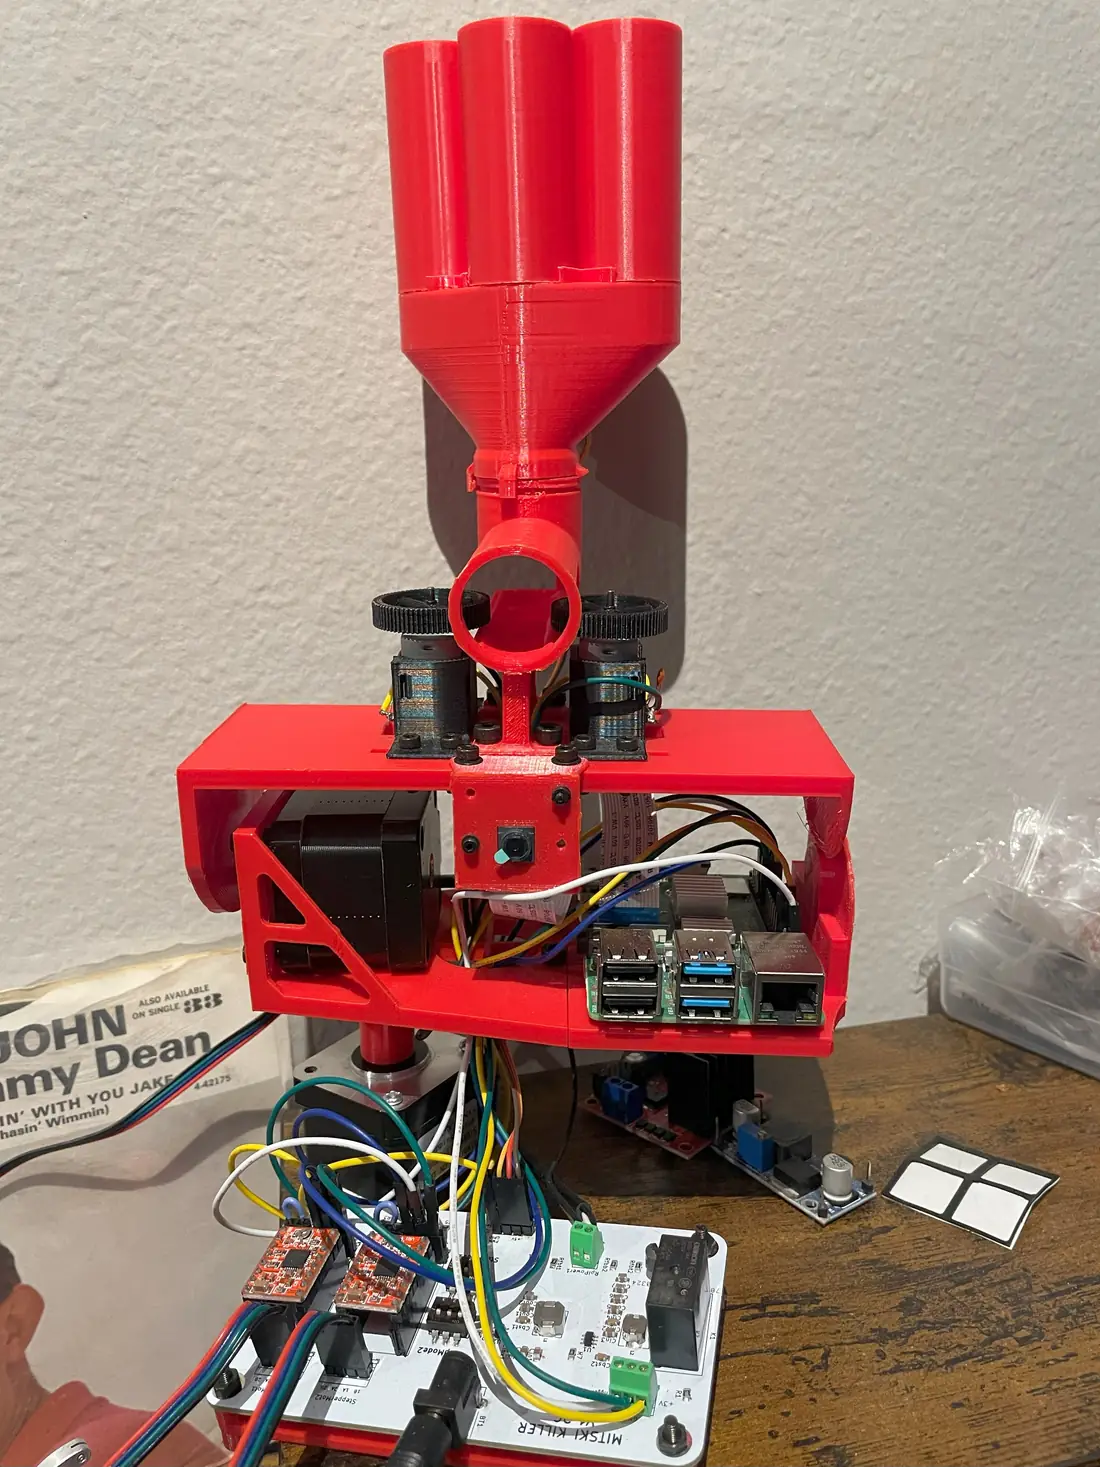
A pan/tilt turret that watches a room, finds whatever moved, aims at it, and fires a foam ball. The target is an entitled, panther-looking black cat named Mitski. The actual problem is getting from pixels to motor angles quickly enough to hit a moving cat, and reliably enough that the thing doesn't fire at shadows. I started it in 2023 on an ESP32, hit the limits of what that chip could do, and shelved it. I picked it back up in 2025 on a Raspberry Pi with an architecture that could actually hold the whole feature set. The current version covers image processing, motion control, a Flask control server, four CAD revisions of the mechanism, and a custom PCB. I wrote all of it myself, with no AI-generated code.
Two attempts, and why the first one stopped
The first build, in 2023, was an ESP32 system (Cam_Tracking_ESP) that I deliberately kept cheap, with as few external libraries as I could manage. That was the whole point at the time. I wanted to understand each layer instead of importing it. What stopped it was capability rather than effort. The ESP32 couldn't drive the kind of control interface I wanted, and it couldn't hold the control loop speeds that aiming and firing needed while processing frames at the same time.
Coming back to it in 2025 on a Raspberry Pi 4B meant giving up some of that and accepting prebuilt architecture, but it bought enough headroom for everything that followed. The Pi hosts the control GUI, runs the camera, processes frames, and drives the motors in one process.
Mockable, so it can be tested without the hardware
Every hardware dependency sits behind an interface, picked at startup by
a factory that reads config. Set mock on the camera or the
GPIO layer and the system swaps in a stand-in that returns synthetic
frames and swallows pin writes.
- Why that matters. The whole application runs on a laptop with nothing plugged into it. That's also what lets CI work on a hardware project: GitHub Actions lints and runs the test suite on every push and pull request, on a runner that has no Pi attached.
- Detection and motion are decoupled. An observer/event layer carries detections from the camera side over to the motor side, so image processing knows nothing about what acts on its output.
- Motor control is layered. Raw stepper and servo drivers sit under an aiming controller and a firing controller, which both sit under a single motor-control facade. Pin-level detail stays at the bottom.
- Anything tunable lives in JSON. Pin assignments, step mode, speeds, servo open and closed angles, minimum object size, spool time, and the degrees-per-percent aiming constants are all config, parsed into typed config classes at load.
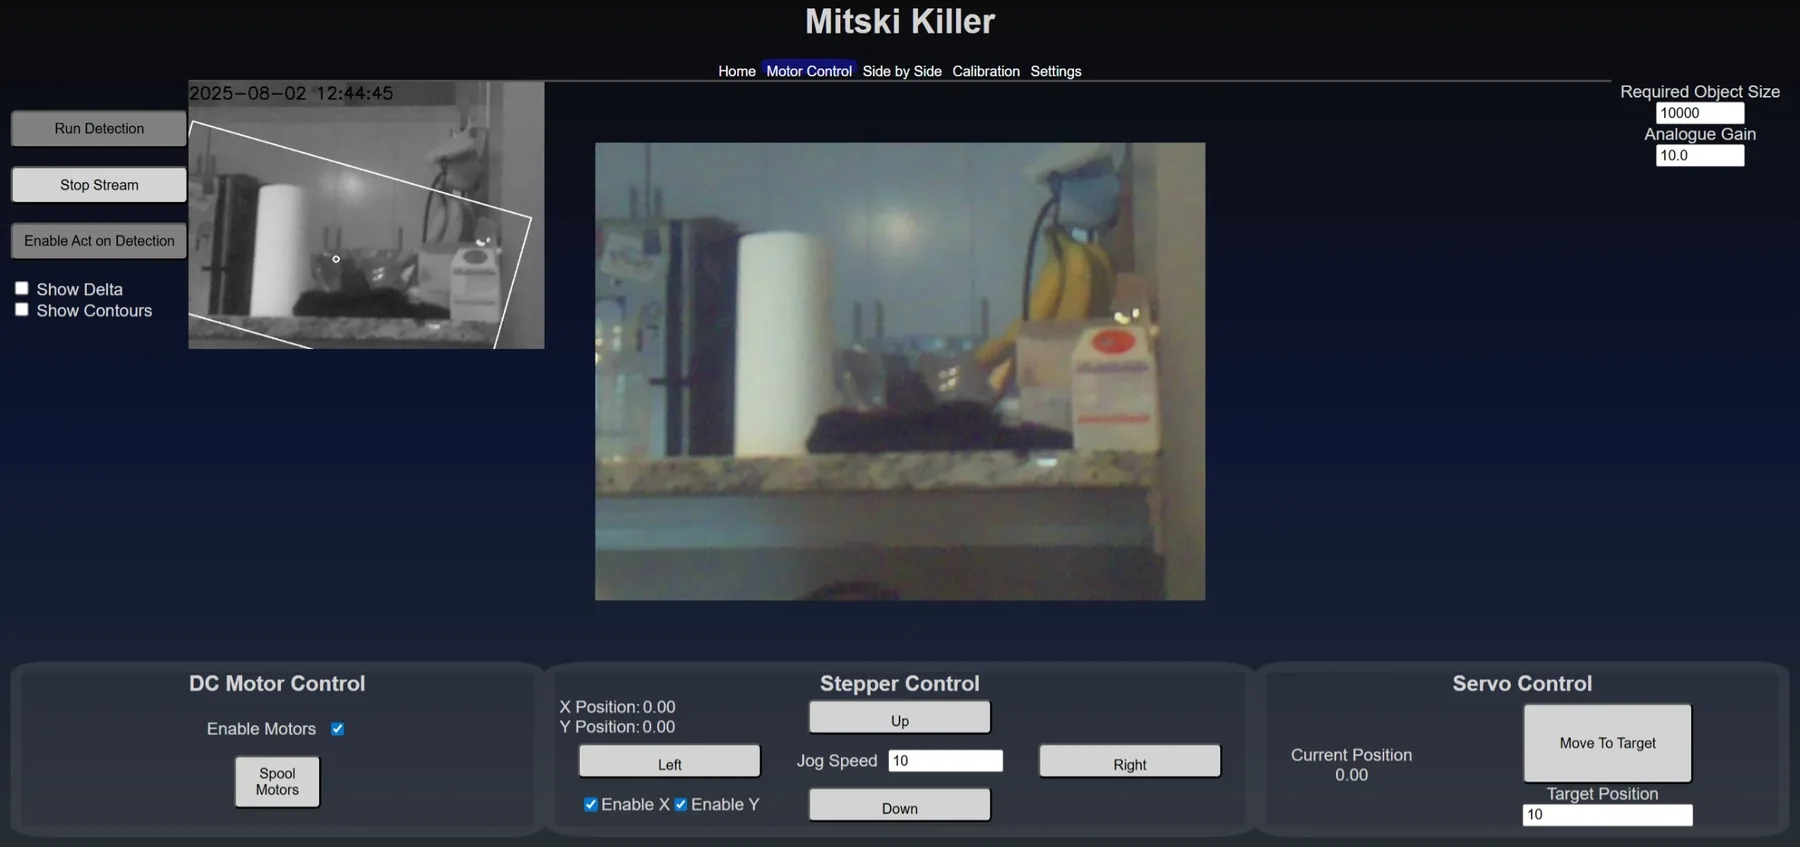
- Flask control server. A browser GUI streams the processed camera feed with its detection overlays, and handles settings and manual motor control. It can also show the raw difference mask or the drawn contours, which is what makes it possible to tune detection by eye.
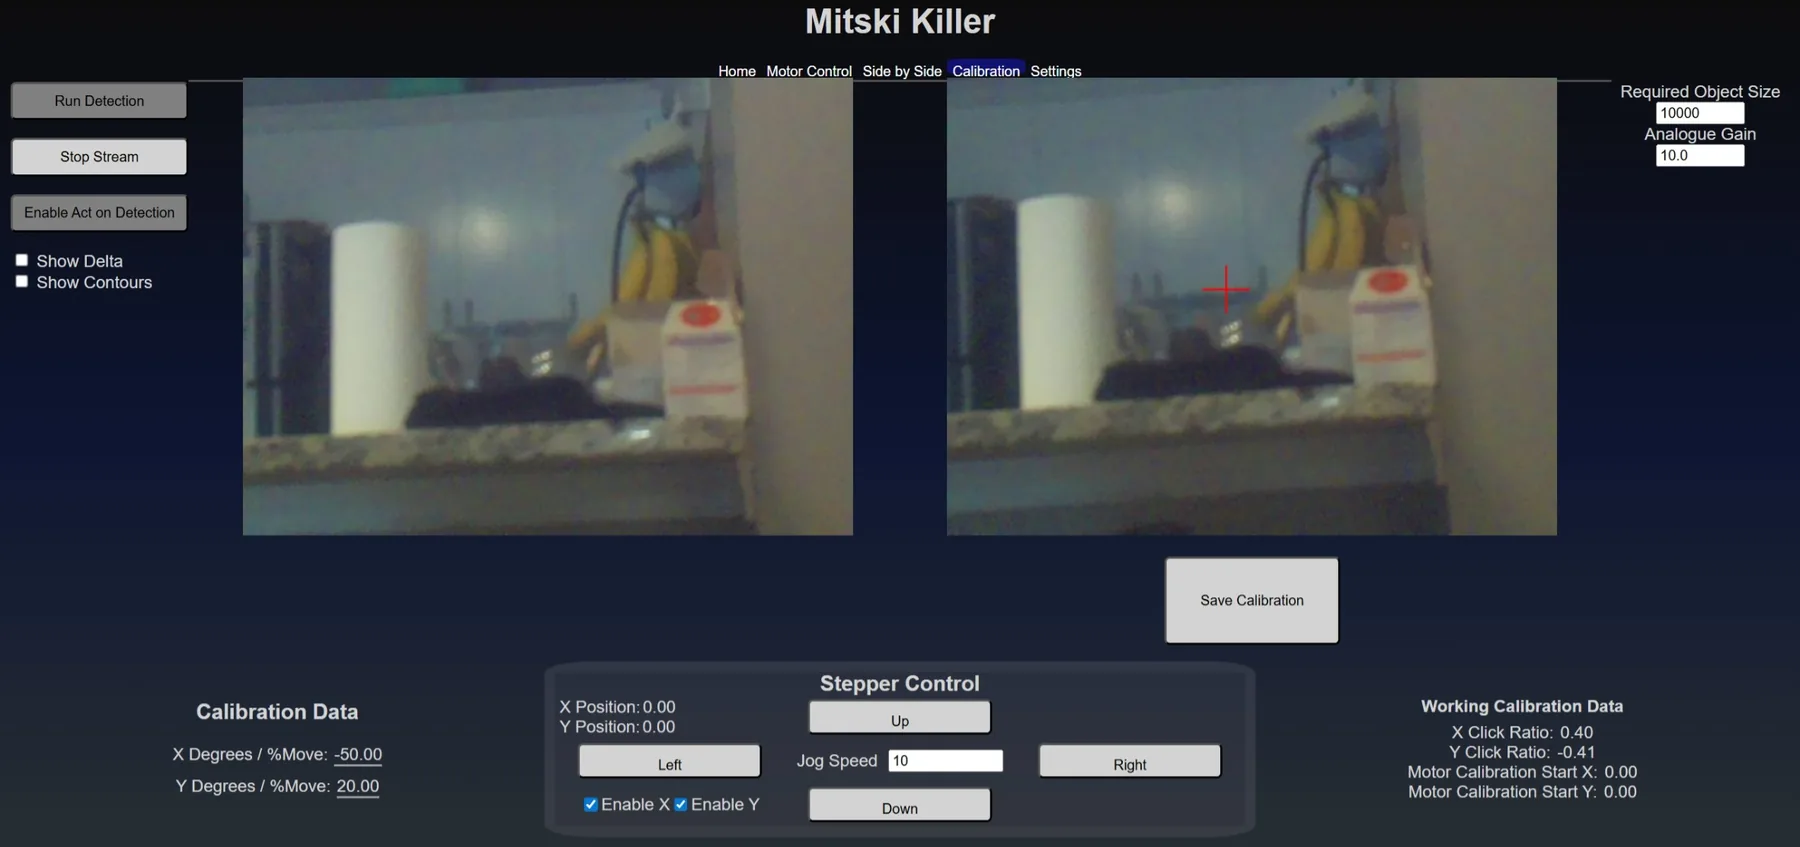
- Calibration tab. Aiming depends on how many motor degrees match one percent of frame offset, and that changes with lens, mounting, and gearing, so it can't be a constant in the source. The GUI walks the procedure instead. Click a point on the live frame and it stores that click as a ratio from center, along with the current stepper positions. Jog the turret until it is actually pointing at what you clicked, then save. It takes the motor deltas, divides by the click ratios, and pushes the resulting degrees-per-percent factors to the server for both axes.
Mechanical and electrical, iterated the same way
None of the software matters if the thing underneath it can't hold an angle, which is where most of the revisions came from.
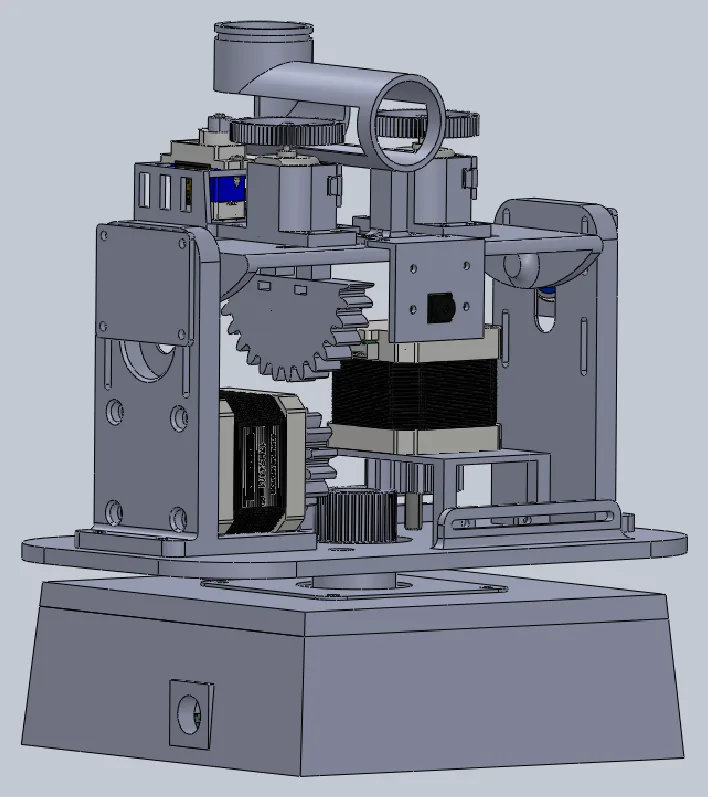
- Mechanism. A pan/tilt table carrying a spinning-barrel launcher. Two hobby DC motors spool up a pair of wheels, and a servo chambers a 3/4-inch foam ball into them.
- Four CAD revisions. The pan axis started belt-driven and ended up direct drive. The belt stage needed room for the motor, the pulleys, and the belt run itself, and that geometry didn't fit the package I was working within. SolidWorks part and assembly files are versioned in the repo through Git LFS.
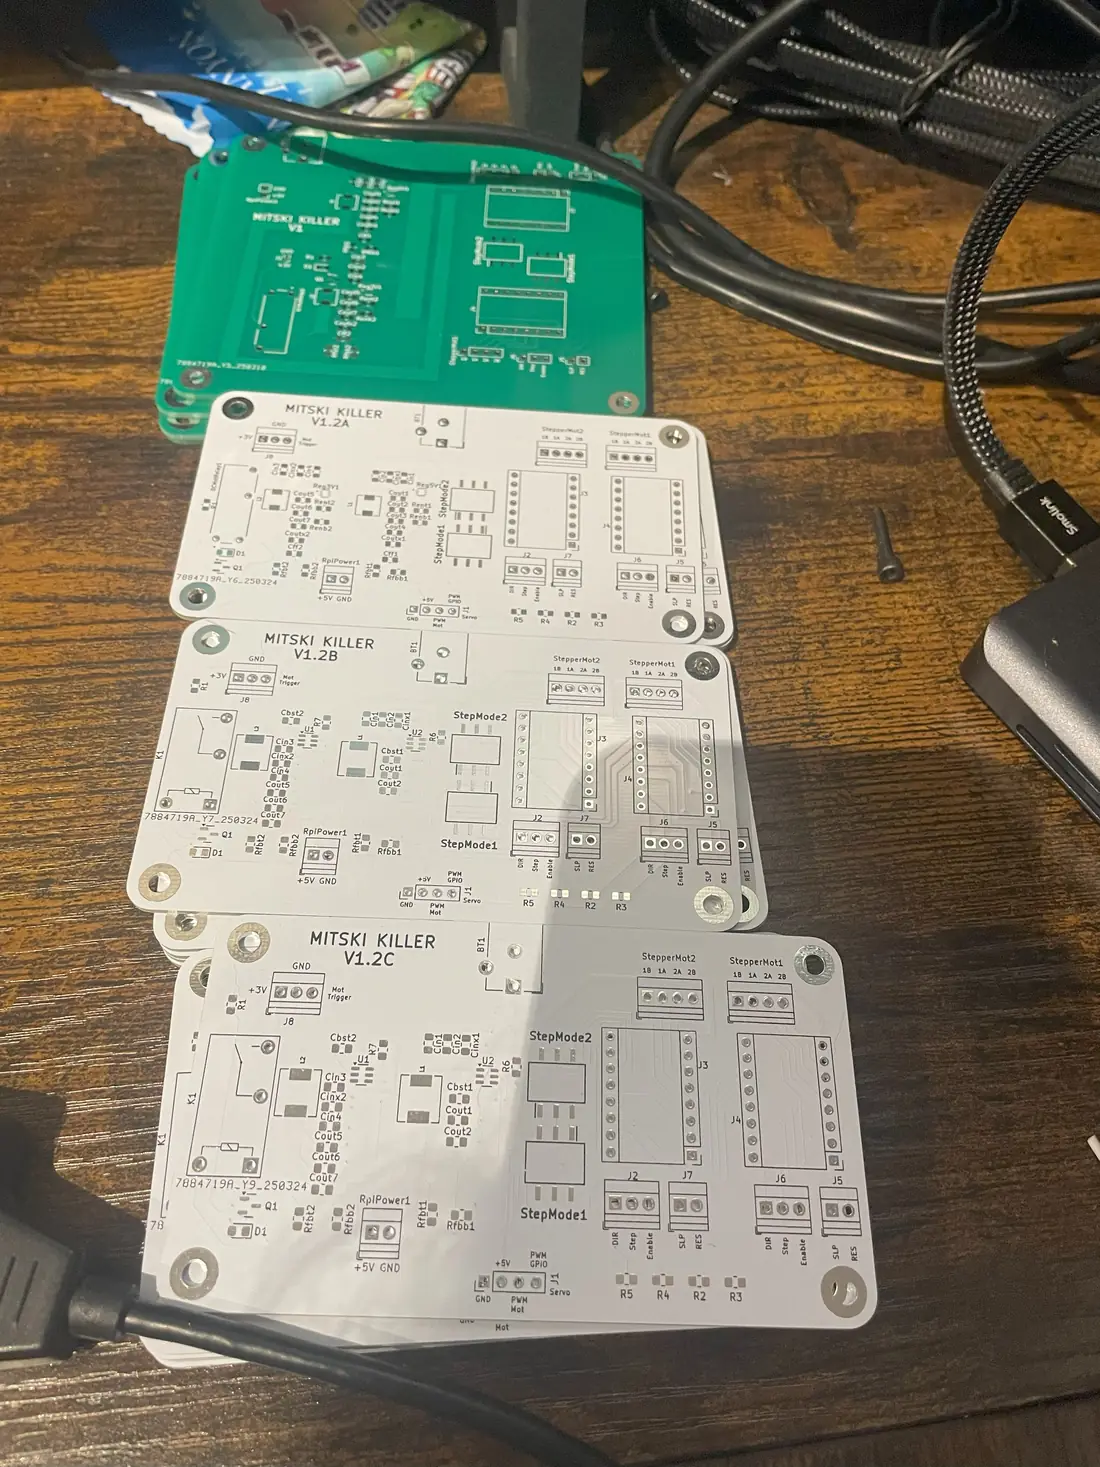
- Custom PCB. Designed and iterated in KiCad, from a green V1 through three more revisions, carrying three supply levels so logic and motor voltage stay separated on one board instead of a breadboard full of modules.
- Aiming hardware. Two NEMA 17 steppers at 1/16 microstepping on both axes, driven through pigpio with software travel limits.
Where it stands
It detects, aims, and fires. What I'm still working on is accuracy, hitting targets while they're moving, tidying up the wiring, improving the mechanical drive, and the finishing touches that take it from a working system to a finished one. Documentation is uneven in places, since this started as something I was building for myself rather than for anyone else to read.